


Cat's Eye 1
The Cat's Eye 1 is currently my primary aerial photography plane. It is a hand-launched belly-lander and was designed from the start to overcome many of the limitations of other planes that I have used for aerial photography. It has been successful beyond my expectations and has performed flawlessly since the spring of 2008.

Fig 1 - Cat's Eye 1 Aerial Photography plane, in flight (photo thanks to Nigel Chippindale)
This is the first plane I have designed. It is, shall we say, "inspired" by the Shot Getter (that is, most of the best ideas are taken directly from it), but is sufficiently different that I feel somewhat justified in giving it my own name and claiming it's my own design.
After casting about for a suitable name, and not finding anything particulary apt, I decided to settle on the obvious and just call it the Cat's Eye, with the 1 designation to allow me to follow up with a 2, 3, 4, etc...
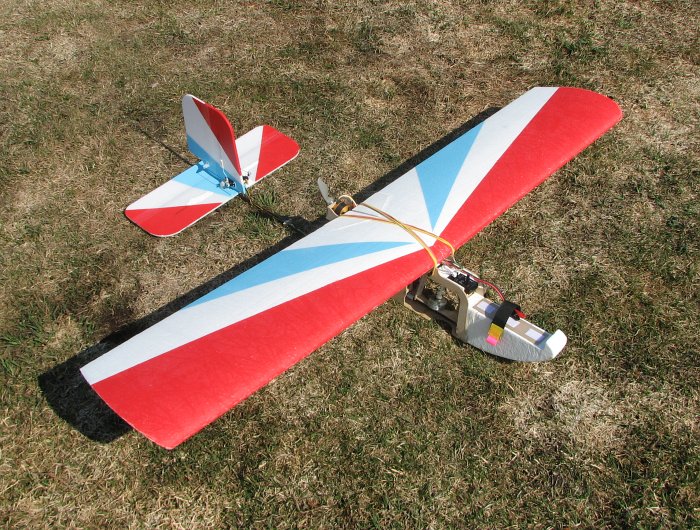
Fig 2 - Cat's Eye 1 - ground photo
The Build
I have documented the "build" on this thread on RCGroups. Please visit the thread and feel free to post comments or questions. I also have some drawings available.
Concept
I modeled the Cat's Eye 1 on my Long-Nose Getter since I wanted to duplicate its flight characteristics. However, the Getter is designed as an ROG (rise off ground) vehicle and as such requires some kind of "runway", such as close-cut grass, pavement or fairly smooth level dirt. I have not attempted to hand-launch the Getter, however, given that I found the 40-oz MagpieAP to be rather unwieldy to hand-launch, and the Getter is 50 oz, I suspect it would be a handful.
The Cat's Eye 1 was designed to be hand-launched, and I have dispensed with the landing gear. The plane just lands on it's belly. This should allow much more flexibility in sites where I can launch and land. A belly-lander means I can just "mush" into whatever is available and soft. Grass, dirt, crops, a handy hedge, whatever. So goes the theory.
Specifications
My "specifications" for this model, then, break down as follows:
- "Suitcaseable" (The ability to "break down" the plane and store it flat in a not-too-large box or suitcase.)
- Quick setup (The ability to take the plane out of the suitcase, assemble it, and launch it in under five minutes.)
- Hand-launch (For use when there isn't a handy runway.)
Quick setup/breakdown suitcase AP platform
One of the main specs is the ability to break the plane down and store it in a suitcase or box that will not take up too much room in the back seat or trunk. I should be able to set it up and launch it quickly, get my pics, then break it back down and store it for the next time.

The above shows the parts that the plane breaks down into. They are as follows:
A - Wing joiner (3/16" music wire bent to the 6º dihedral angle)
B - Strapping tape to hold the wing halves together
C - 1/4" nylon screws to hold the strapping tape
D - Fuselage and boom
E - Battery (FlightPower EVO20 2100mAH 3s1p LiPo)
F - Camera mounting screw
G - Camera (Nikon Coolpix 7600)
H - Camera mount
J - Horizontal assembly (horiz stab and elevator)
K - Vertical assembly (fin and rudder)
L - 1/4" nylon screws to hold the tail feathers on the boom
The
servos are mounted on the same assembly as their respective control
surfaces. Both of these
assemblies are removable from the boom, and assembled using two 1/4"
bolts. The "boom" is just a piece of 1/4" diameter CF (carbon fibre)
rod,
which fits into plastic tubes mounted to the fuselage. Thus the "boom"
is theoretically removable, but I don't remove it under normal
circumstances as it involve unplugging the servo wires and fishing then
out of the fuselage. I
am planning on designing a carrying box.
Hand-Launch
When I first got into R/C, most of the other pilots were flying small, hand-launch planes such as a Zagi, so I naturally began hand-launching mine as well. One of the problems I've always had with this is the way existing planes are usually adapted for AP. Usually this involves taking an existing design which is known to fly well (slow, stable, predictable, etc.) and just add a camera. The easiest and most logical place to put the camera is right at the CG (Center of Gravity).If you put it somewhere else, you have to move other components around to accommodate it. The other advantage to this is you can accommodate cameras of varying weights without having to move other components around to balance the plane.
However, therein lies a problem. When you hand-launch a plane, you obviously have to hold it in your hand, and the logical place to hold it is at the CG. Oops, there's a camera there now! What usually ends up happening is you have to hold it to the rear of the CG (wherever is available to get a good grip on it) and hold the nose up awkwardly.
The idea of mounting the camera at the CG makes a lot of sense for AP planes that are adapted from non-AP planes, or AP planes that will need to accommodate cameras of considerably different weights. This seems to have become sort of a "tradition" even in purpose-built AP planes. But there seems to me no compelling reason why this nees to be the case for a purpose-built AP plane, if the cameras to be used are within a limited weight range.
Therefore, I designed the fuselage so that it had a nice easy place to grip it, right at the CG, and moved the camera forward of the CG. Moving the camera forward of the CG, of course, has to be compensated for, to keep the CG where it's supposed to be. First, the servos are now mounted in the tail. Second, the LG are gone. And third, the nose has been shortened as required (remember it had to be lengthened on the Long-Nose Getter — hense the name).
Flight Characteristics
After all the trouble I had with takeoffs of the MagpieAP, the Cat's Eye 1 is a breath of fresh air. After a fairly assertive hand-toss and full throttle, it has no tendency to pitch up or down, the wings stay level, and I rarely have to even make corrections.
This is particularly important for a hand-launch plane, as there is a half-second between when you let go of the plane and your hand reaches down to take the transmitter sticks where you cannot react if the plane does something unexpected. With the Cat's Eye 1 this is simply not an issue.
Flight is slow and predictable. It climbs quickly with power on and glides very well with power off. I have only had one problem with it. With full power, if I put her nose down and it picks up speed, it has a tendency to go into a dive, and pulling up elevator doesn't seem to be effective in pulling it out. I have yet to figure out this problem, perhaps something to do with the "springiness" of the boom? At first, when it got into this dive situation, it would "snap" out of it suddenly and rather frighteningly. (It proved, if nothing else, that the wing is plenty strong enough!) I eventually figued out this "snap" was the front of the wing lifting off the wing saddle. Since then I have doubled the number of elastics holding the wing down, from 4 to 8 and have not had the "snap" problem since. The dive problem remains, but fortunately the solution is very simple. As soon as I remove power I get control back immediately.
I have mostly landed it on grass surfaces, which is simplicity itself. It just settles down on the ground and skids to a stop. I have also landed it in a fallow field of tall weeds by flaring it a bit on touch-down to scrub off some speed, although it flies slowly enough this probably wasn't necessary. I haven't tried to land it in more "challenging" locations just yet, but I don't anticipate any problems.
Conclusion
As I have mentioned several times above, I have been extremely pleased with this plane. I has more than met my expectations. I was thinking that this would be a "learning experience" and I would be able to apply the lessions learned in a Cat's Eye 2, 3, etc. However, it turns out I have a very good plane out of it.
For a sample of some of the results, please see my Crysler page. I hope to do a lot more of this kind of thing with this plane next summer.